Make a signature in word tutorial : Creating a signature in Word can be done using various methods. Here's a simple way to add a signature using the drawing tools in Microsoft Word:
Open Microsoft Word:
Launch Microsoft Word and open the document where you want to add your signature.
- Insert a Drawing Canvas:
- Go to the "Insert" tab in the Word ribbon.
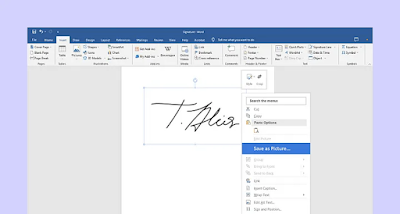
- Click on "Shapes" in the Illustrations group.
Under the "Lines" section, select "Scribble." (It may also be named "Freeform" or "Curve" in some versions of Word.
- Draw Your Signature:
- Click and hold the left mouse button.
- Draw your signature using the mouse or touchpad.
Release the mouse button when you're done.
Adjust and Refine:
- After drawing your signature, you can use the resizing handles or the drawing tools to adjust and refine the signature.
Save the Drawing as an Image (Optional):
Once you are satisfied with your signature, you can right-click on the drawing and choose "Save as Picture" to save it as an image.
Insert the Image into Your Document (Optional):
If you saved your signature as an image, you can insert it into your document:
- Go to the "Insert" tab.
- Click on "Pictures" or "Online Pictures" to insert the saved image.
Position and Resize:
Adjust the position and size of the inserted signature image as needed.
Save Your Document:
Save your document to keep the changes.
Remember that this method may not provide a secure or authenticated signature. For more formal and secure electronic signatures, you may want to explore digital signature tools or services.


